Changing MAC Address in Windows 10
To change the MAC address of a network card on a computer with Windows 10, Right-click on the Internet connection icon and open Network Management and Access.
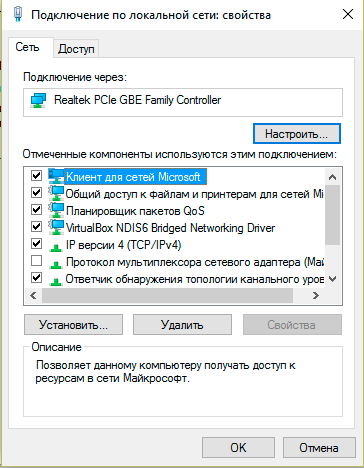
Next, on the left, click on the menu item “Change adapter settings”. Right-click on the “Ethernet adapter” and select “Properties”.

In the same window, click the “Configure” button.
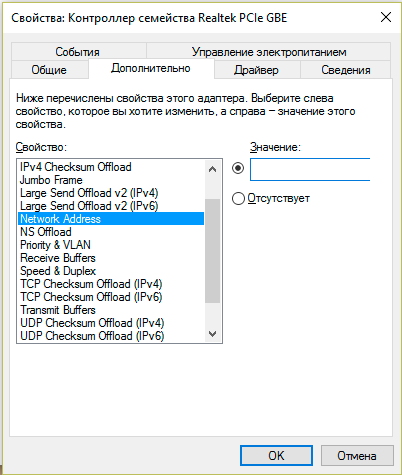
In a new window, go to the “Additional tab”. Select “Network address” from the list, check the box next to the field, and enter the desired MAC address.
Click “OK” to save.